How To Make Homemade Protein Bars?
Who doesn’t love a good protein bar? They’re among the tastiest, most filling, and most convenient healthy snack ideas you can enjoy, whether you prefer store-bought or homemade. If you’re looking for recipes to make your own protein bars though, then you’ve probably got an inkling that DIY’ing it has certain advantages.
Protein Bars are gradually becoming the best available alternative to chocolates and candies. These are available in different interesting flavours such as Cookie Dough, Blueberry Muffin, Peanut Butter, Cookie Cream, etc. Protein bars are delicious snacks packed with nutrition for your body, giving hours of energy without any sugar content. If you’ve ever stashed up on store-bought protein bars, you know it can quickly empty your wallet. To put it mildly, the cost of high-quality pre/post workout energy in the form of a bar is not cheap. Most brands claim that their protein food items are made with 100% natural ingredients. However, to save yourself from any extra ingredients and to save some bucks, you can try these protein bar recipes and make homemade protein bars in your kitchen. This will also give you a chance to customise your favourite flavours and prepare a week’s worth of snacks that will keep you charged & focused.
Making tasty protein bars has never been easier! With the internet to help you as you go and all your ingredients available online, you can bake to your heart’s content. Here’s a simple recipe for amazing Peanut Butter Protein Bars:
Line a baking pan with a baking sheet.
Take a saucepan and heat water. Place a glass bowl over the saucepan and add peanut butter, honey/maple syrup, and coconut oil.
Stir the mix gently until it’s smooth, and then remove the glass bowl from the top.
Now add rolled oats to the peanut butter mixture along with protein powder and flaxseed.
Mix well, and then add cinnamon and salt. The mix may seem very lumpy and dry at first, but you need to keep stirring so that it’s combined.
Now that the mixture is ready, pour it evenly into the pan lined with a baking sheet. Let it refrigerate for 2-3 hours or more.
Now take out the bars from the pan. Transfer onto a cutting board and cut desired sizes.
As the holiday season is just around the corner, you can start your journey towards a healthy diet with the correct baking paper. People frequently wonder why baking sheets are given such importance when baking; after all, only serve as a surface for the dish to bake on. However, if you bake frequently, you will know that it does make a difference. A thin sheet may burn up in the middle of the process or darken your cookies from below. If your sheet is too dry, detaching your food from it will be difficult and may result in a mess.
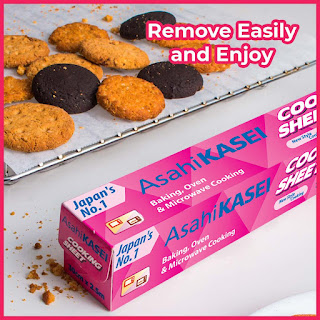
The main purpose of the baking paper is that it provides a heat-resistant and non-sticky surface for the protein bars to bake on. This is why it is necessary to use good quality paper so that it doesn’t stick to your food and tamper with the taste of your baked goods. To assist you, we have got the perfect product for you. The Asahi Kasei Cooking Sheet is renowned to be a kitchen lifesaver. They are known for being the highest quality cooking sheets, ensuring that your delectable treats do not stick to the paper. With the silicone coating on both sides, you can prevent your baking experience from becoming a mess and enjoy the process. Because of the premium quality of the cooking sheet, it does not crumble and can be baked up to 250 degrees in the oven for 20 mins. Just place the sheet on the tray or the pan and put it in the oven.
Even if your baking pan is nonstick, it's a good idea to line it with a cooking sheet. It is much simpler to remove residuals and clean up afterwards. If you don't already have some baking sheets or parchment paper in your kitchen, it's time to stock up. If you've recently had trouble baking protein bars, invest in a new baking sheet to help you avoid issues with your next batch of delicious dough.

Comments
Post a Comment